# Meshing & Collision
Use the Real-time Meshing & Collision Feature
# About this Sample
This sample showcases how to use meshing and collision detection to create a dynamic and interactive environment in your application. The real-time meshing enables you to create intricate 3D models, providing a flexible and scalable approach to creating complex geometries. This makes it easier to learn and interact with large spaces, as the mesh can be dynamically generated and updated as needed. Upon completion, you will have a fully functional scene ready for build and run. To start working with this sample, you need to install Resight Engine.
# Follow these steps after setting up Resight Engine:
- Go to the Resight Samples/Meshing & Collision folder
- Locate the scene named “Real-time Meshing & Collision” and open it
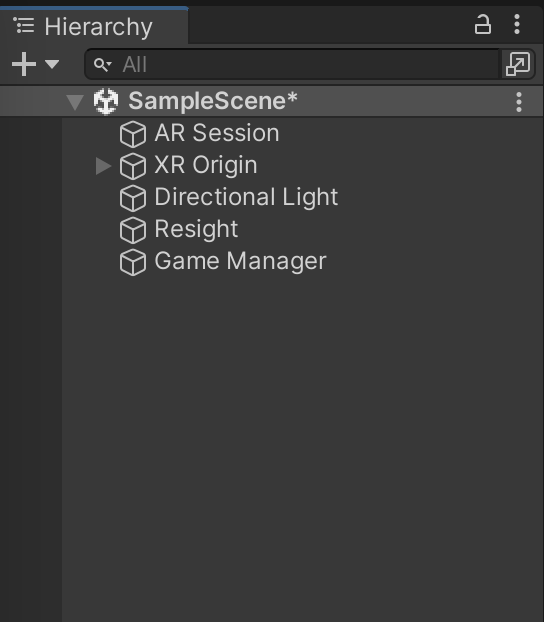
# Real-time Meshing & Collision Scene
The AR setup is complete and features an AR Session to oversee the AR experience, as well as an AR Session Origin, which contains the Main Camera, The AR Plane Manager, and the AR Raycast Manager. The scene is also equipped with the Resight Engine.
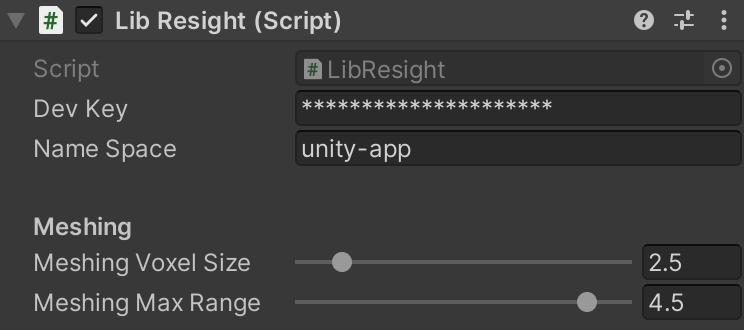
# Resight Engine Settings
- Go to the 'Resight' game object in the open scene
- Find the 'LibResight' component
- Enter your developer key (provided by Resight) and a namespace
- A namespace can be any string (without spaces), for example: Default / Production / Test-1
- A namespace is a unique data store under your developer account
- Mapping data and snapped objects are not shared between different namespaces
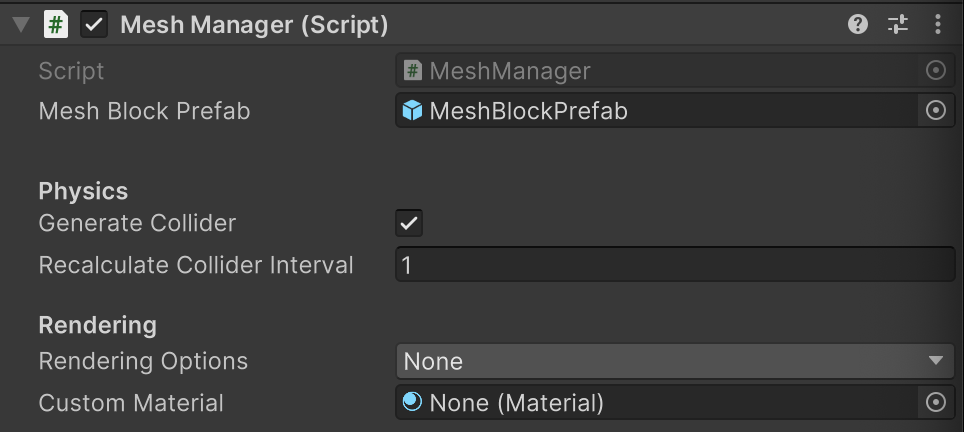
# Mesh Manager
- Go to the 'Resight' game object in the open scene
- Find the 'Mesh Manager' component
# Physics:
- You have the option to disable the collider. This can be useful when you don't want objects to collide with the mesh.
- Add an occlusion manager to your scene by simply dragging the AR Camera under the AR Session Origin. This will enable the camera to recognize and occlude real-world objects, allowing virtual objects to appear more realistic and natural within the scene.
# Rendering:
- Select a pre-made shader/material for your mesh. This can save you time and effort as you can choose from a range of pre-existing options rather than creating your own from scratch.
- Add your own custom shader/material.
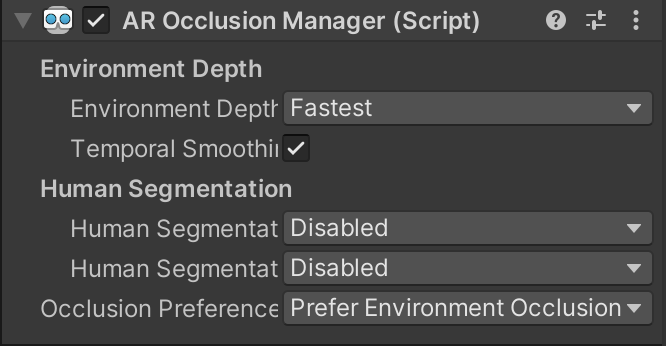
# AR Occlusion Manager
The AR Occlusion Manager provides real-time occlusion of virtual objects in AR scenes. Occlusion refers to the effect of blocking the view of one object by another, as occurs when one object is placed in front of another in the real world.
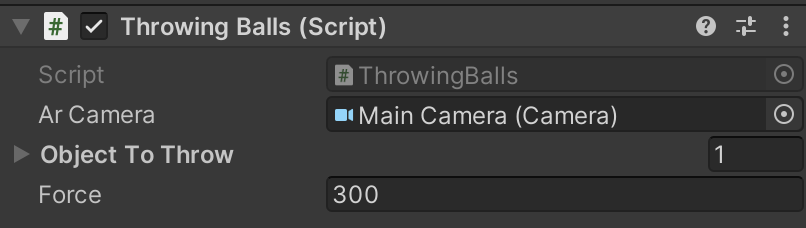
# Game Manager
The 'ThrowingBalls' script in the Game Manager launches objects from the camera when the player touches the screen. The objects are chosen randomly and the launch strength is set by a variable. When the player touches the screen, the script creates a copy of a randomly chosen object in front of the camera and gives it a push in the direction that the camera is facing, using the launch strength variable.
The scene comes with pre-made materials, 3D models, and Prefabs that are ready for your use without any restrictions. Enjoy! 🙃