# Virtual Camera
Demonstrate a seamless method for transitioning between first-person and third-person cameras.
# About this Sample
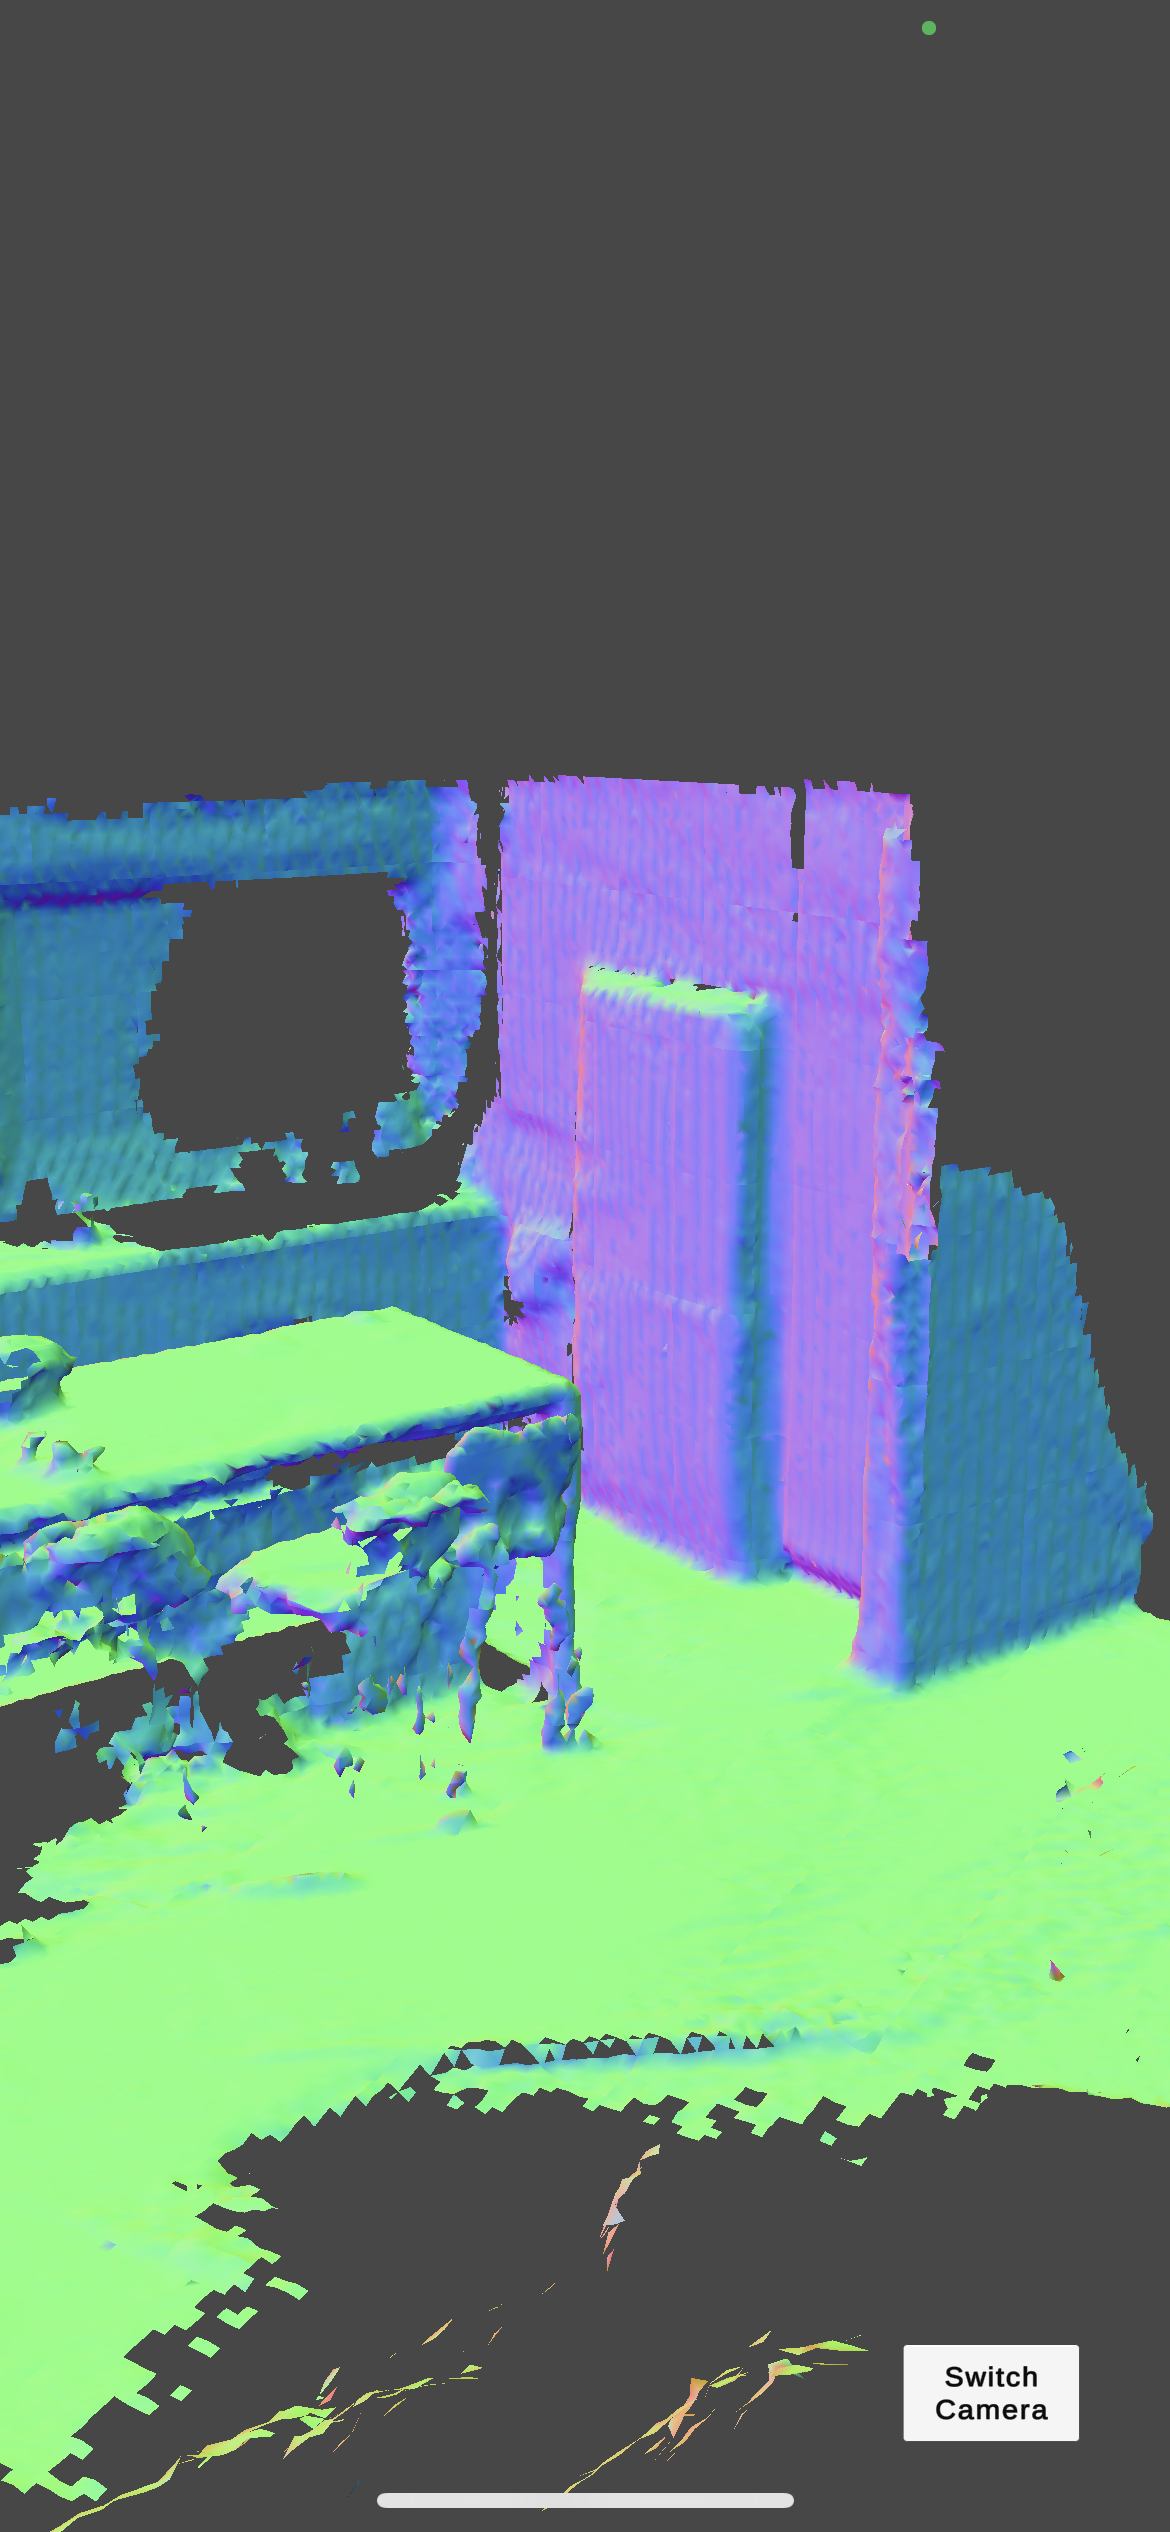
This sample provides a straightforward demonstration of how to switch between an AR-camera and a virtual camera. It includes a single button that facilitates the transition between the two cameras, making it useful for applications that require visualizing live 3D scans. Once completed, you will have a fully operational scene that is ready for building and running. To begin working with this sample, you will need to install he Resight Engine.
# Follow these steps after setting up Resight Engine:
- Go to the Resight Samples/Basic Placement Sample folder
- Locate the scene named “Virtual Camera” and open it
# Virtual Camera Scene
The AR setup is complete and features an AR Session to oversee the AR experience, as well as an AR Session Origin, which contains the Main Camera, The AR Plane Manager, and the AR Raycast Manager. The scene is also equipped with Resight Engine.
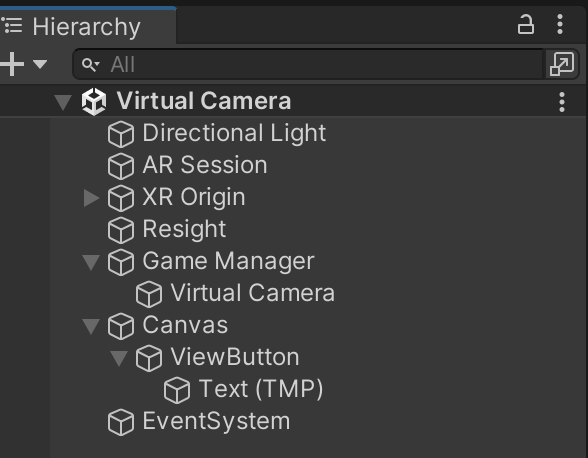
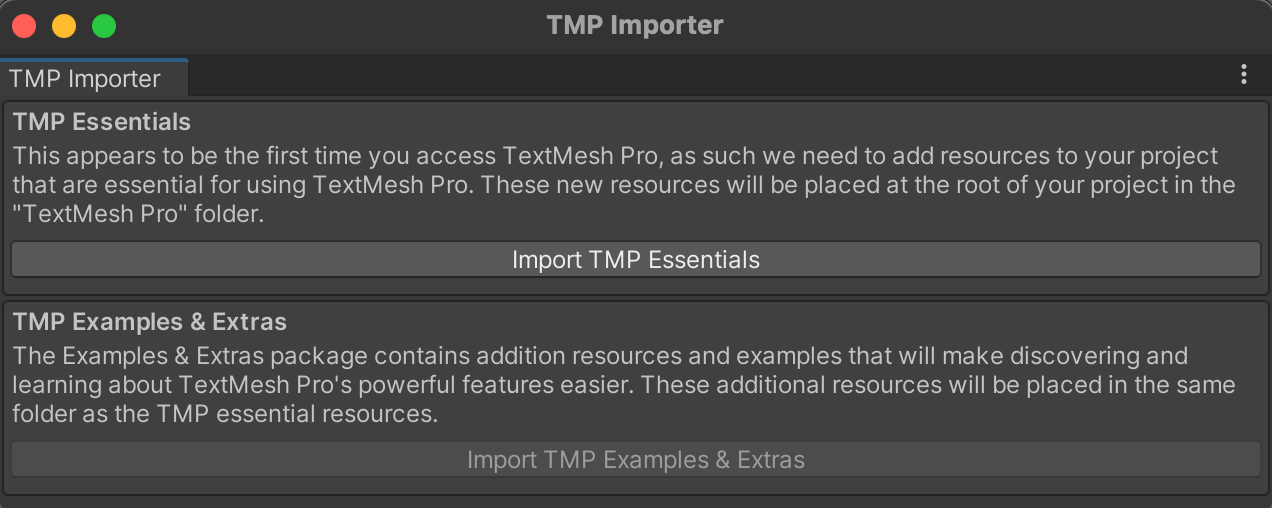
Right after you open the scene, a pop-up will ask to import TextMesh Pro (TMP). Press Import TMP Essentials
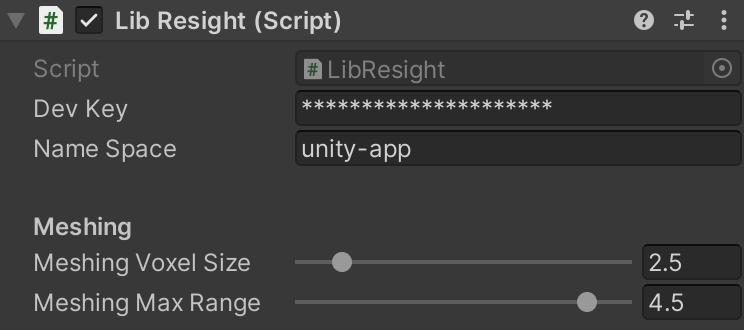
# Resight Engine Settings
- Go to the 'Resight' game object in the open scene
- Find the 'LibResight' component
- Enter your developer key (provided by Resight) and a namespace
- A namespace can be any string (without spaces), for example: Default / Production / Test-1
- A namespace is a unique data store under your developer account
- Mapping data and snapped objects are not shared between different namespaces
# Game Manager Component
- There is a single script called CameraControl and it's attached to the VirtualCamera object
- The VirtualCamera::Camera is disabled by default as well as its CameraControl and is enabled by VirtualCamera.cs script uppon switching from MainCamera.
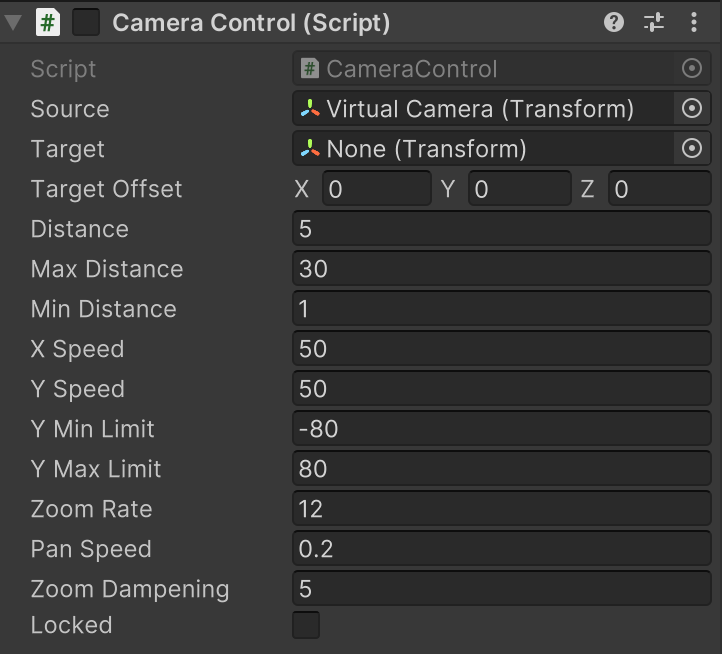 As evident, there are numerous configurations available for experimentation, and they are quite self-explanatory. You can begin by using the default settings and explore further customization options as you move on.
 - The switching logic happens in the VirtualCamera script uppon clicking the Switch Camera button. We suggest you take a look at the SwitchCameraButton__clicked function within VirtualCamera.cs which performs the actual switching. The scene comes with pre-made materials, 3D models, and Prefabs that are ready for your use without any restrictions. Enjoy! 🙃